Installing BurnerAlert on Horizontal or Vertical orientation knobs.
Horizontal Knob Installation
- Video #1 Instructions for Horizontal knobs (REQUIRES MAGNETS)
Vertical Knob Installation
- Video #2 Instructions for Vertical knobs (NO MAGNETS)
Tips and Techniques
Download Printable Instructions (Vertical)
Troubleshooting Vertical BurnerAlert Install
NOTE: Vertical model will NOT work on horizontal orientation (for example: cooktops where knobs push down not in)
Beeping when knob turned off
Solutions:
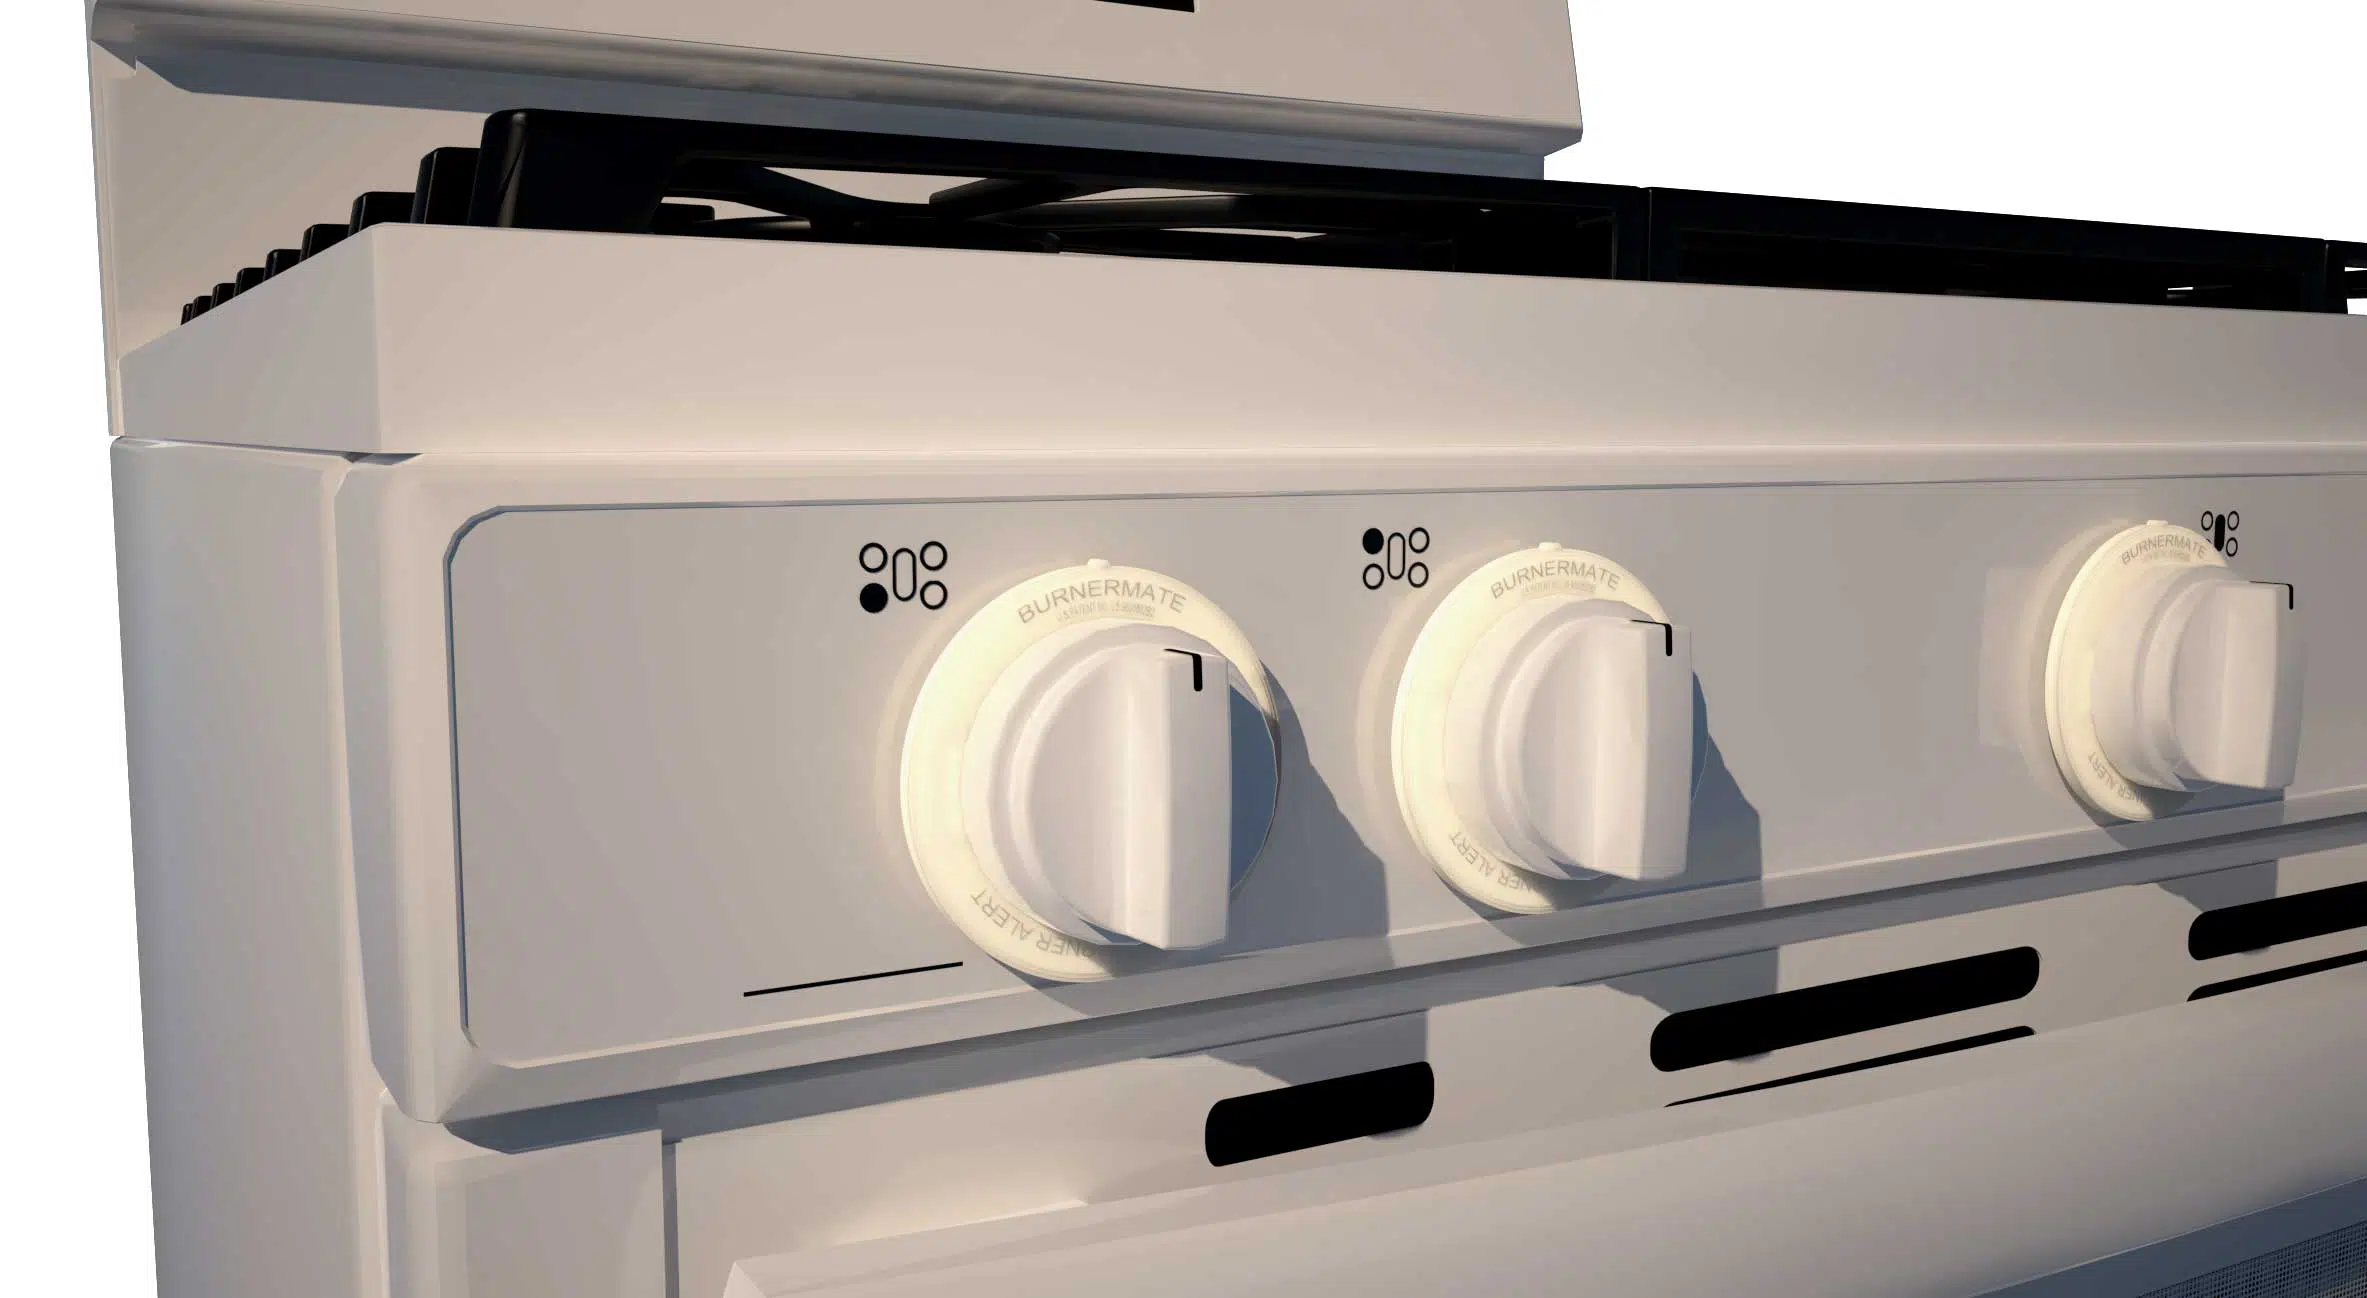
- Bump/Ridge on edge of BurnerAlert not aligned to top of knob and the OFF position (Bump is adjacent to the flashing light) Bump/Ridge is not the battery door.
- Knob on a slope that is less than 45-degrees (see above photo)
- Battery Low in power
Cannot push in and turn knob after disc is attached to knob
Solutions
- Black collar was not installed
- Collar was pushed onto the valve stem more than an ¼”
- Collar is too loose. Collar must be very tight on the stem. Call if your collar is too loose. We will send out new collars.
BurnerAlert installed backwards
Solutions
Red side of the BurnerAlert is the “back” and must face towards the stove.
Download Printable Instructions (Horizontal)
Troubleshooting Horizontal BurnerAlert Install
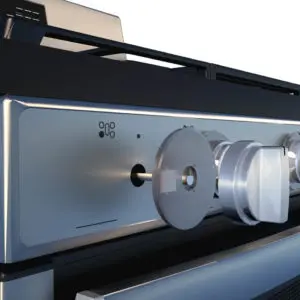
What Not To Do – INCORRECT INSTALLATION
REPLACING THE BATTERY
HERE IS THE SOLUTION IF YOUR STOVE KNOBS HAVE RIMS CLICK HERE
1-Installation Video for HORIZONTAL knob orientation BurnerAlerts (white back and magnets) Please watch the 5 minute video below.
NOTE: Collars should fit VERY TIGHT around valve stem.
Click here to download written Instructions Printable – BurnerAlert use and instructions for HORIZONTAL knobs (cooktop style-knobs on top).
Click here to download written Instructions (Horizontal)
2-Installation Video for VERTICAL knob orientation BurnerAlerts (Red Back – no magnets) Please watch the 3 minute video below.
NOTE: Collars should fit VERY TIGHT around valve stem.
Click here to download written Instructions (vertical)
Printable – BurnerAlert use and instructions for VERTICAL knobs (on front of stove).
NOTE: Vertical Knob Orientation BurnerAlerts : DOES NOT REQUIRE MAGNETS.
Printable – 3 Critical Steps for a Perfect Installation
1-Orientation – Bump on Edge of Disc Must Point Up and the RED Back must face towards the stove.
2-Tape – Always Use 3 pieces of tape per knob
3-Collars – Fit must be snug – (Allows for knob to depress)
Click here to download 3 Critical Steps
Tips and Techniques
How to firmly secure tape adhesive to BurnerAlert disc and Stove Knob

Tips to attach BurnerAlert to Cooktop

Printable – Tips and Techniques to attach BurnerAlert to Cooktop.
Alignment Tool for Printing
Printable – Alignment Tool.
Click here to download the Burneralert-alignment-tool
Troubleshooting
- Beeping when Knob is Turned Off
- Beeping when knob turned off can be caused two ways.
- When the battery is low a non sequenced beeping may repeat, SOLUTION: Replace battery
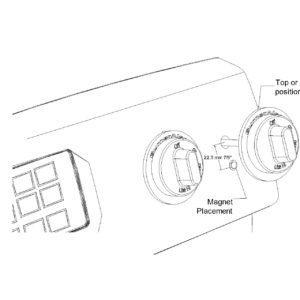
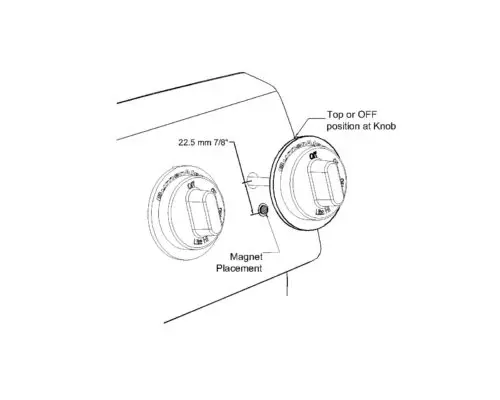
- Magnet is misaligned. SOLUTION: realign magnet as per magnet tool and apply clear tape dot over magnet to keep magnet in place.
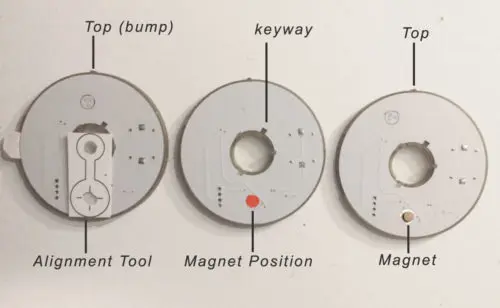
- The magnet needs to about 7/8″ from the center of the valve stem. Magnets are attached to the stove not the BurnerAlert. See Pictures Below:
- Beeping when knob turned off can be caused two ways.
What Not To Do – THE INCORRECT BURNERALERT INSTALL
How to Remove and Replace the Battery
HERE IS THE SOLUTION IF YOUR STOVE KNOBS HAVE RIMS
If your stove has rims (bezels) you may remove the rims to allow the BurnerAlert to fit. The rims can be re-installed if needed. Below is a video showing one type of rim being removed. The example below shows the general technique to remove the rims. Contact Matt at BurnerAlert if you have more questions.